Account Setup
This guide walks you through the complete account setup process - from creating your account to setting up your first company. Get started with SimpleBillBook in just a few minutes!
Overview
SimpleBillBook is India's simplest invoicing software for small businesses. Our all-in-one platform helps you manage:
- ✅ Sales & Invoicing - Create professional invoices
- ✅ Purchase Management - Track vendor transactions
- ✅ Inventory - Monitor stock levels in real-time
- ✅ Expenses - Record and categorize business expenses
- ✅ Customer Relationships - Manage your customer database
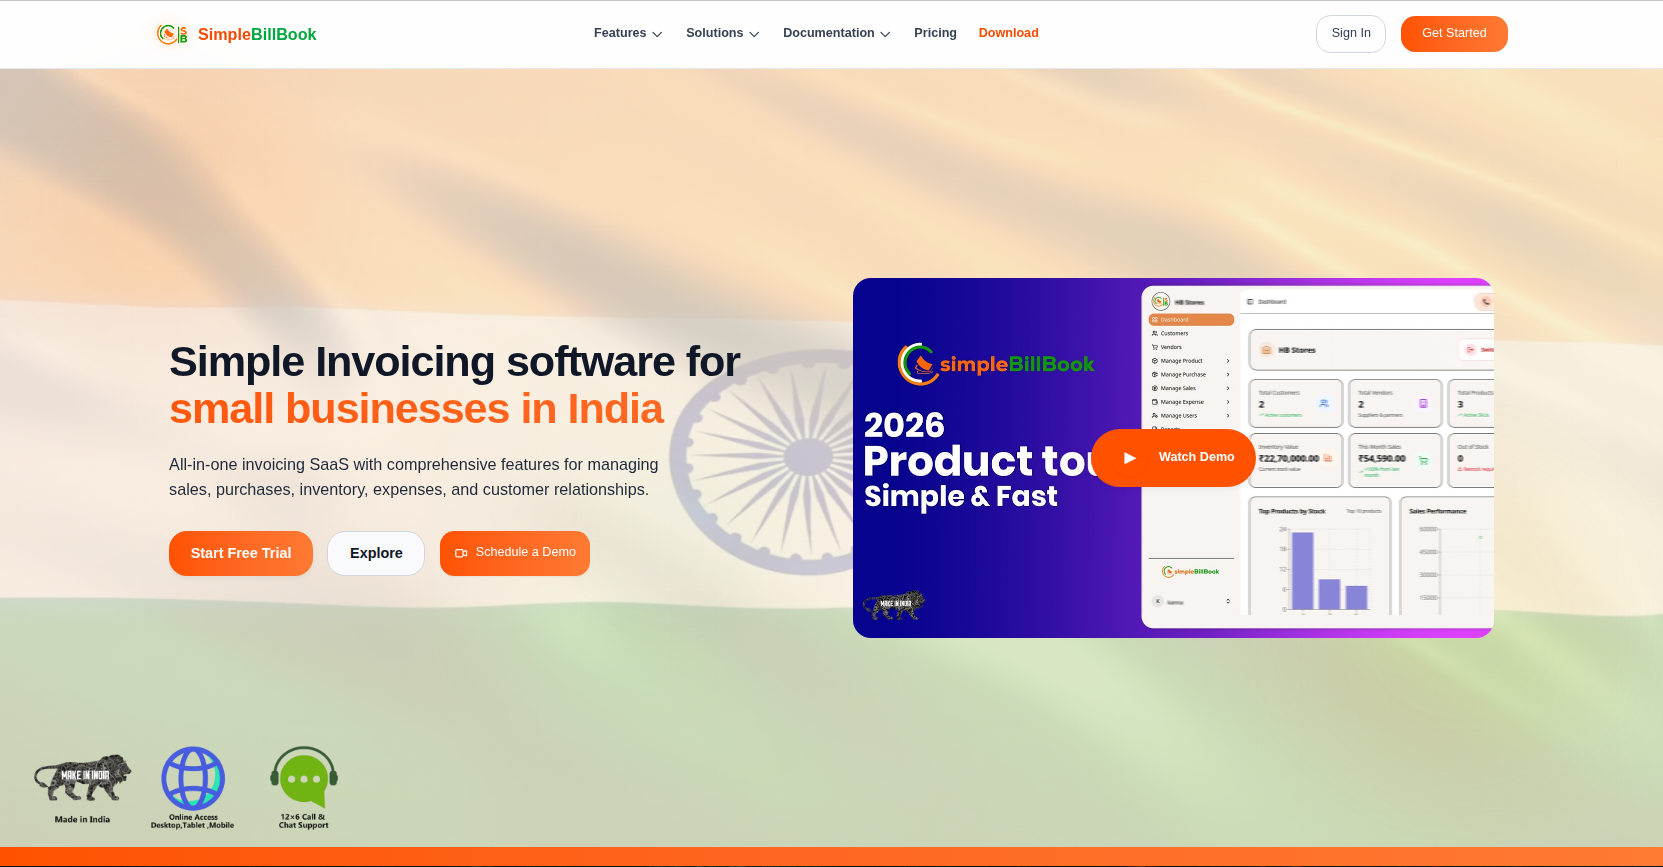 Figure 1: SimpleBillBook - All-in-one invoicing solution for Indian small businesses
Step 1: Create Your Account
Access the Sign-Up Page
Look for the "Get Started" button at the top right corner of the homepage. Clicking this will take you to the account creation page.
➡️ Follow these steps to sign up:
Fill Registration Form
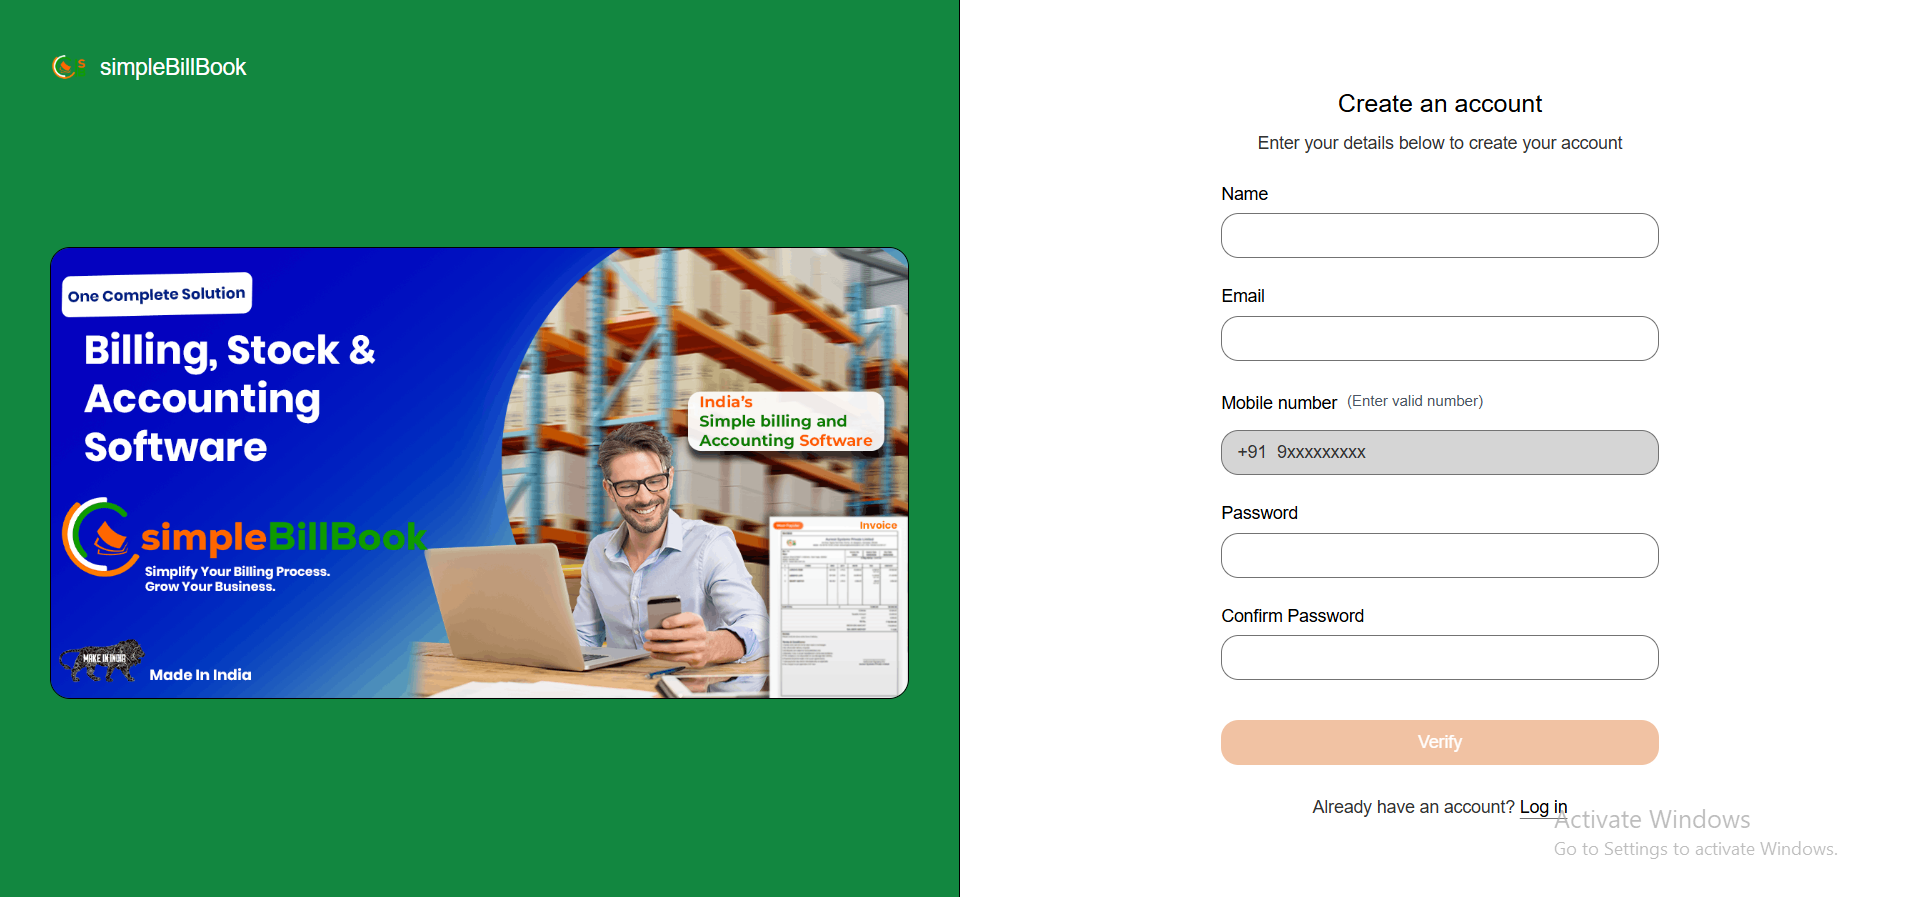 Figure 2: Account creation form with required fields
Required Information:
| Field | Description | Example |
|---|---|---|
| Name | Your full name | Jeeva |
| Email Address | Valid email for login | jeeva@example.com |
| Password | Secure password | •••••••• |
| Mobile Number | Valid mobile number | xxxxxxxxxx |
| Confirm Password | Re-enter your password | •••••••• |
Password Requirements:
- Minimum 8 characters
- Mix of letters and numbers
- At least one special character recommended
Submit Registration
Click Verify to submit your registration. You'll receive an One Time Password(OTP) shortly.
Step 2: Verify Your Mobile Number
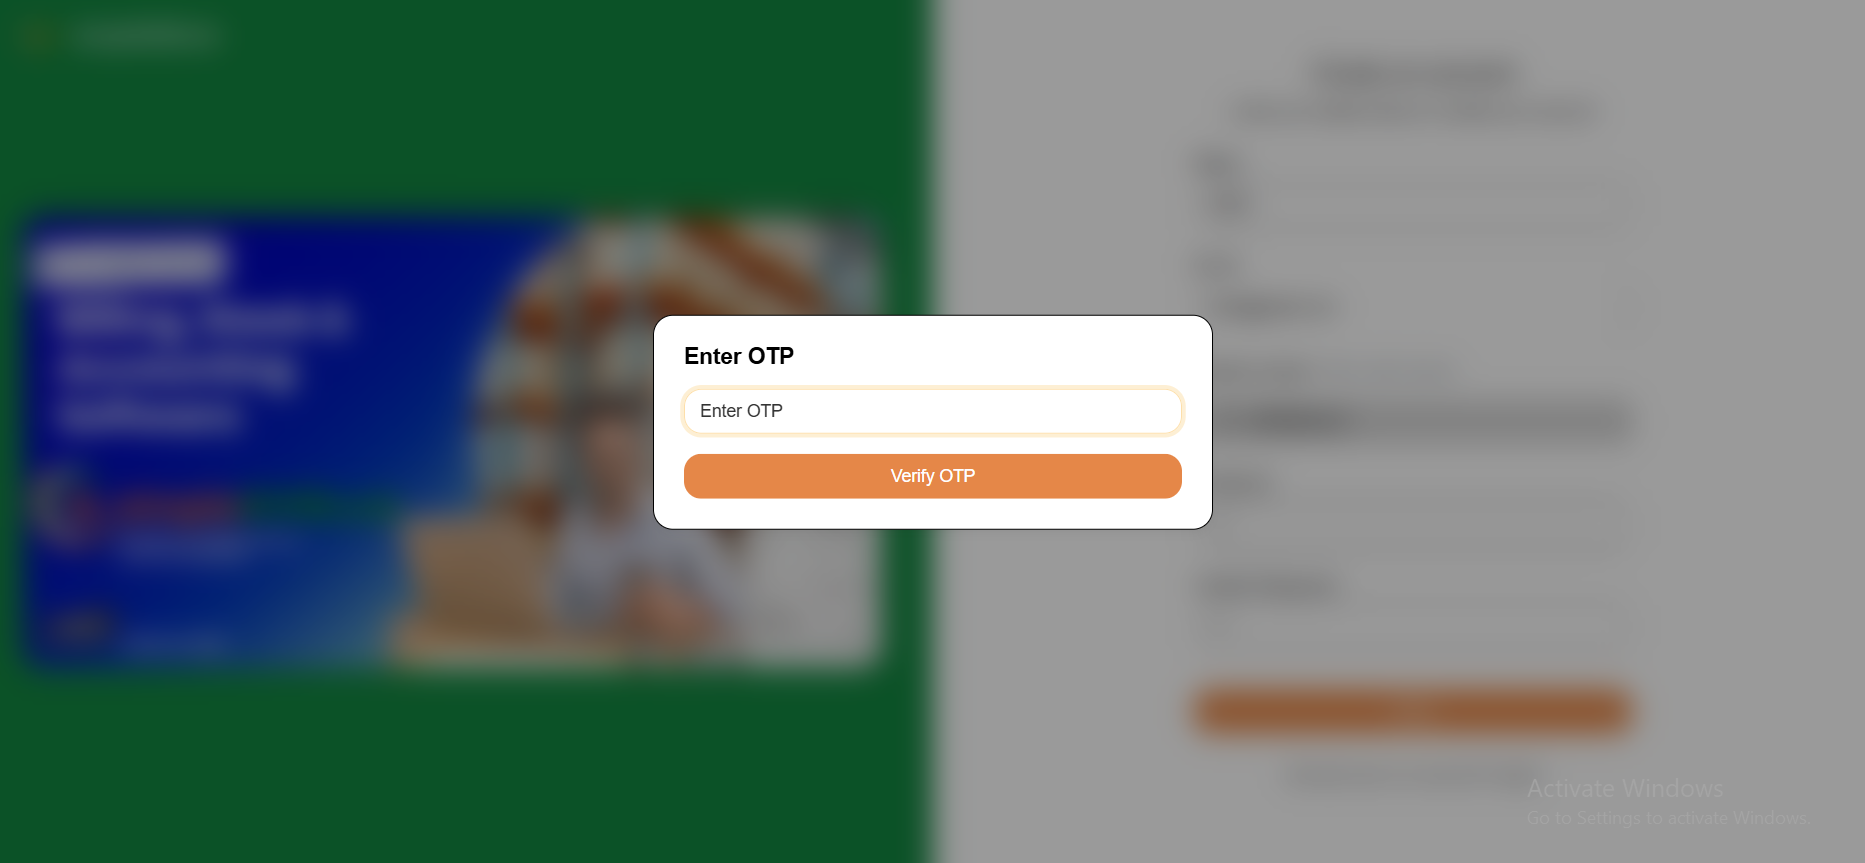 Figure 3: Mobile number verification page
After registration, you will be redirected to the OTP verification screen. On this page:
- Enter the OTP (One-Time Password) sent to your registered mobile number.
- Click the Verify OTP button to complete verification.
- Ensure the OTP is entered before it expires.
Didn't receive the OTP?
- Check your mobile network connection
- Wait a few moments for the message to arrive
- Click Resend OTP to receive a new verification code
Entered the wrong mobile number?
- Use the Logout button to return to the login page and register again with the correct mobile number
⚠️ Important: You must verify your mobile number using the OTP before accessing the application.
Step 3: Welcome Dashboard
After mobile number verification, you'll be greeted by the welcome dashboard:
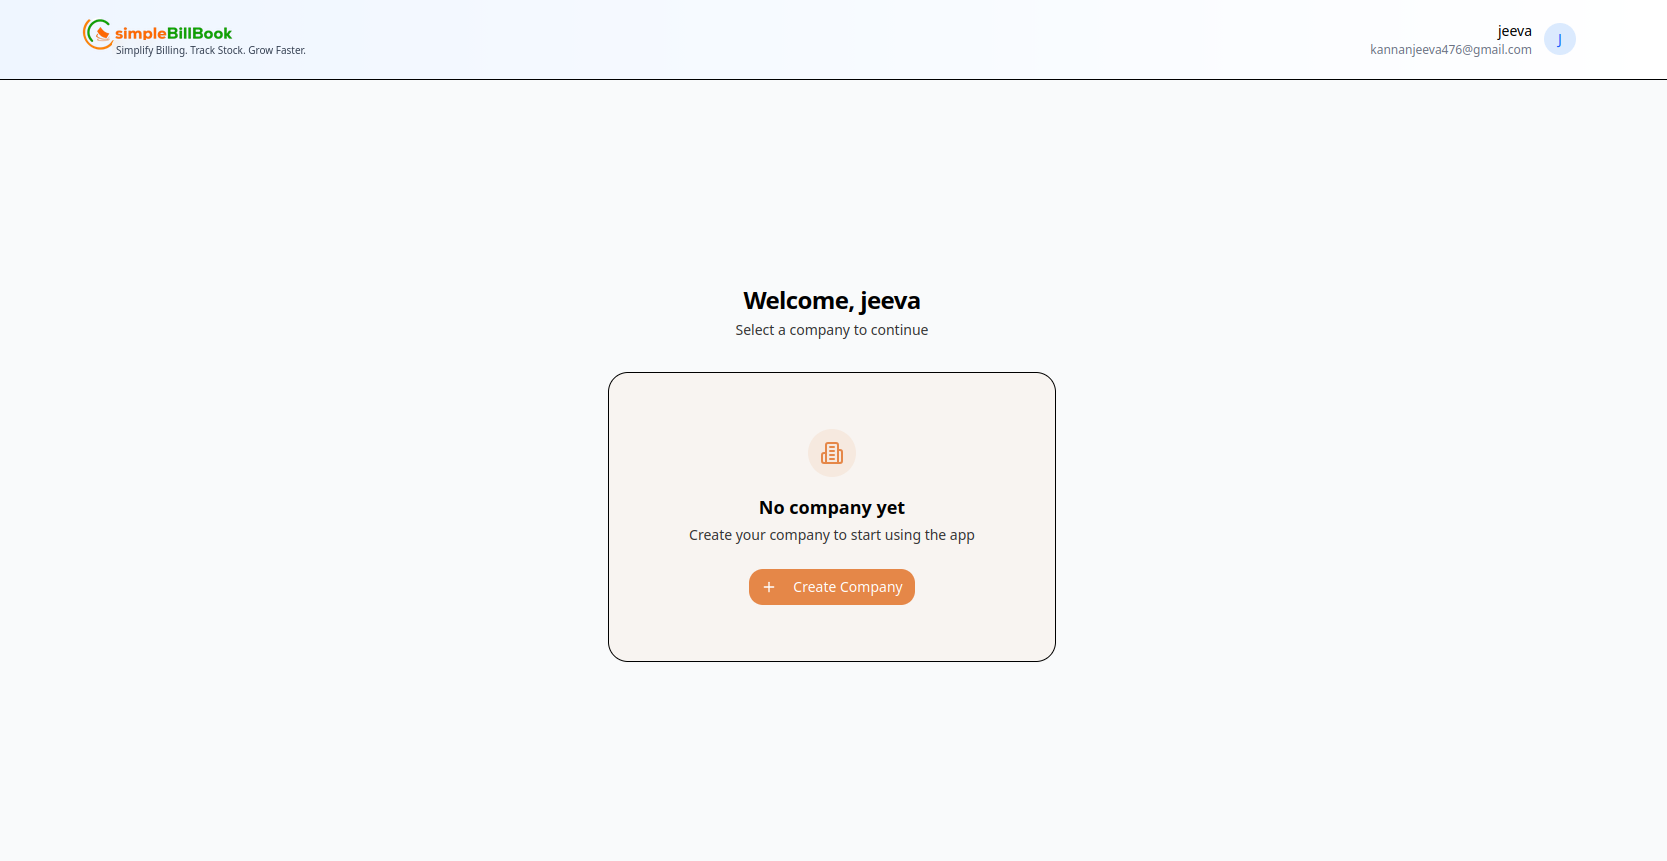 Figure 4: Welcome screen showing company selection
What You'll See:
| Element | Description |
|---|---|
| Welcome Message | Personalized greeting with your name |
| Company Status | "No company yet" for new users |
| Action Button | Create Company to get started |
| User Email | Your registered email address displayed |
Tagline
"Simply Billing. Track Stock. Grow Faster." - Your journey with SimpleBillBook begins here!
Step 4: Create Your First Company
Access Company Creation
Click the Create Company button to set up your business profile.
Fill Company Details
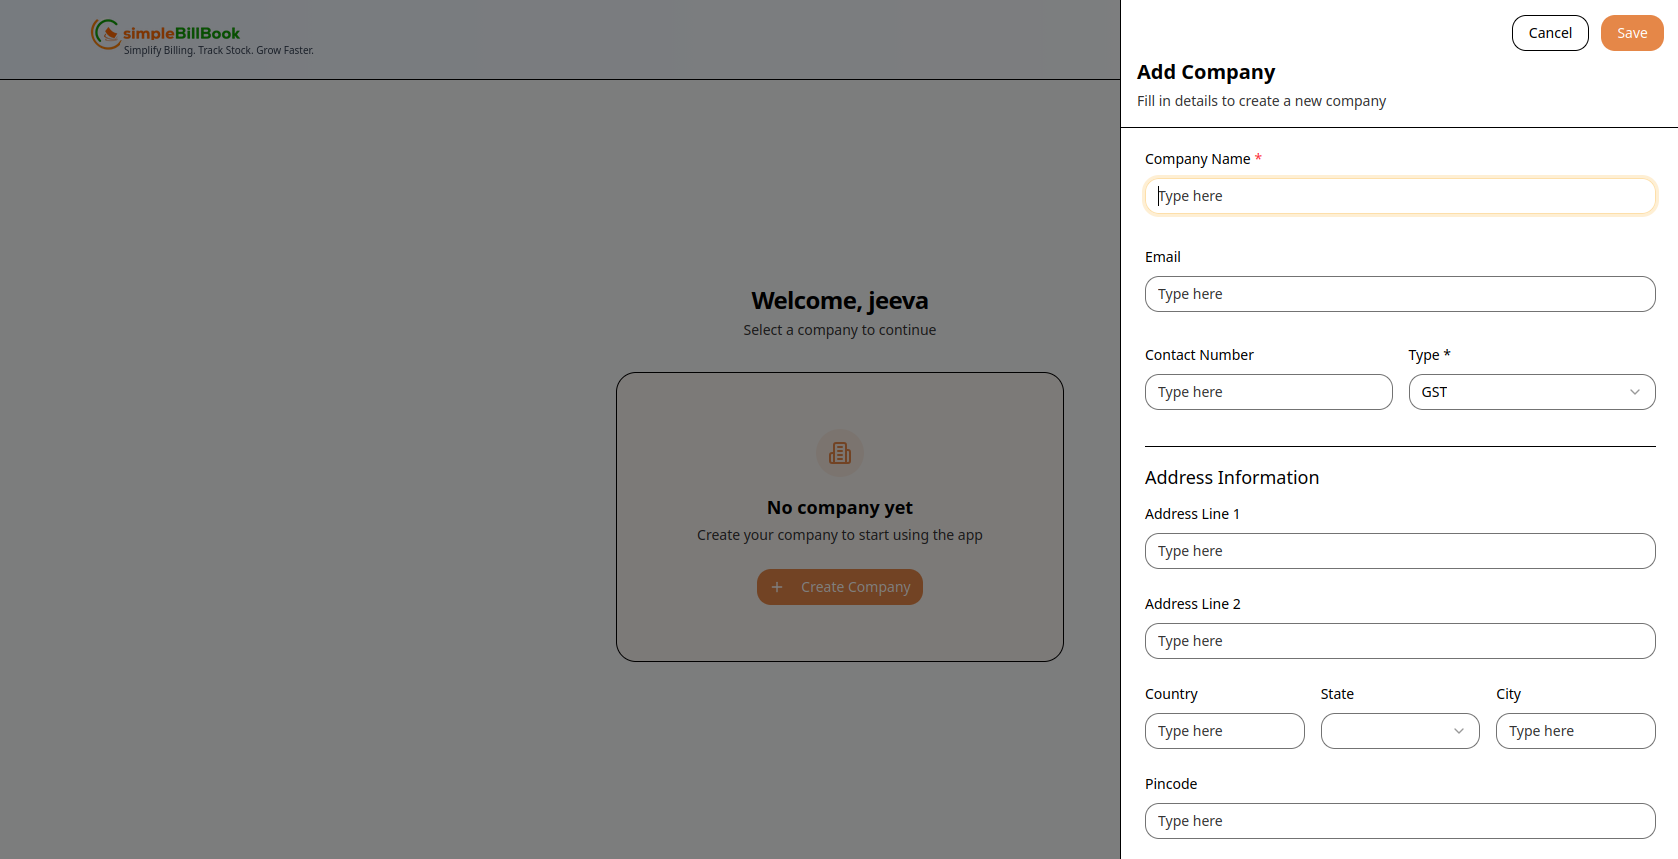 Figure 5: Comprehensive company creation form
Required Information:
| Section | Field | Required | Description |
|---|---|---|---|
| Basic Info | Company Name | ✅ Yes | Your business legal name |
| ❌ No | Business contact email | ||
| Contact Number | ✅ Yes | Phone number with type selection | |
| GST | ❌ No | GST identification number |
Address Information:
| Field | Required | Description |
|---|---|---|
| Address Line 1 | ❌ No | Primary street address |
| Address Line 2 | ❌ No | Apartment, suite, or landmark |
| Country | ❌ No | Select from dropdown |
| State | ✅ Yes | Select from dropdown |
| City | ❌ No | Enter city name |
| Pincode | ❌ No | Postal/ZIP code |
| GST Number | ❌ No | e.g., 07AABCU9603R1ZM |
| PAN Number | ❌ No | e.g., ABCDE1234F |
| Bank Name | ❌ No | Name of the bank |
| Account Number | ❌ No | Bank account number |
| IFSC Code | ❌ No | Indian Financial System Code |
| Latitude | ❌ No | e.g., 13.0827 |
| Longitude | ❌ No | e.g., 80.2707 |
| Company Logo | ❌ No | Upload logo file |
Form Actions
| Button | Action |
|---|---|
| Save | Save company details and proceed |
| Cancel | Discard changes and return |
💡 Tip: Only Company Name, Contact number, GST type and State are required to get started. You can add other details later!
Step 5: Select Your Company
After creating your company, you'll see the company selection screen:
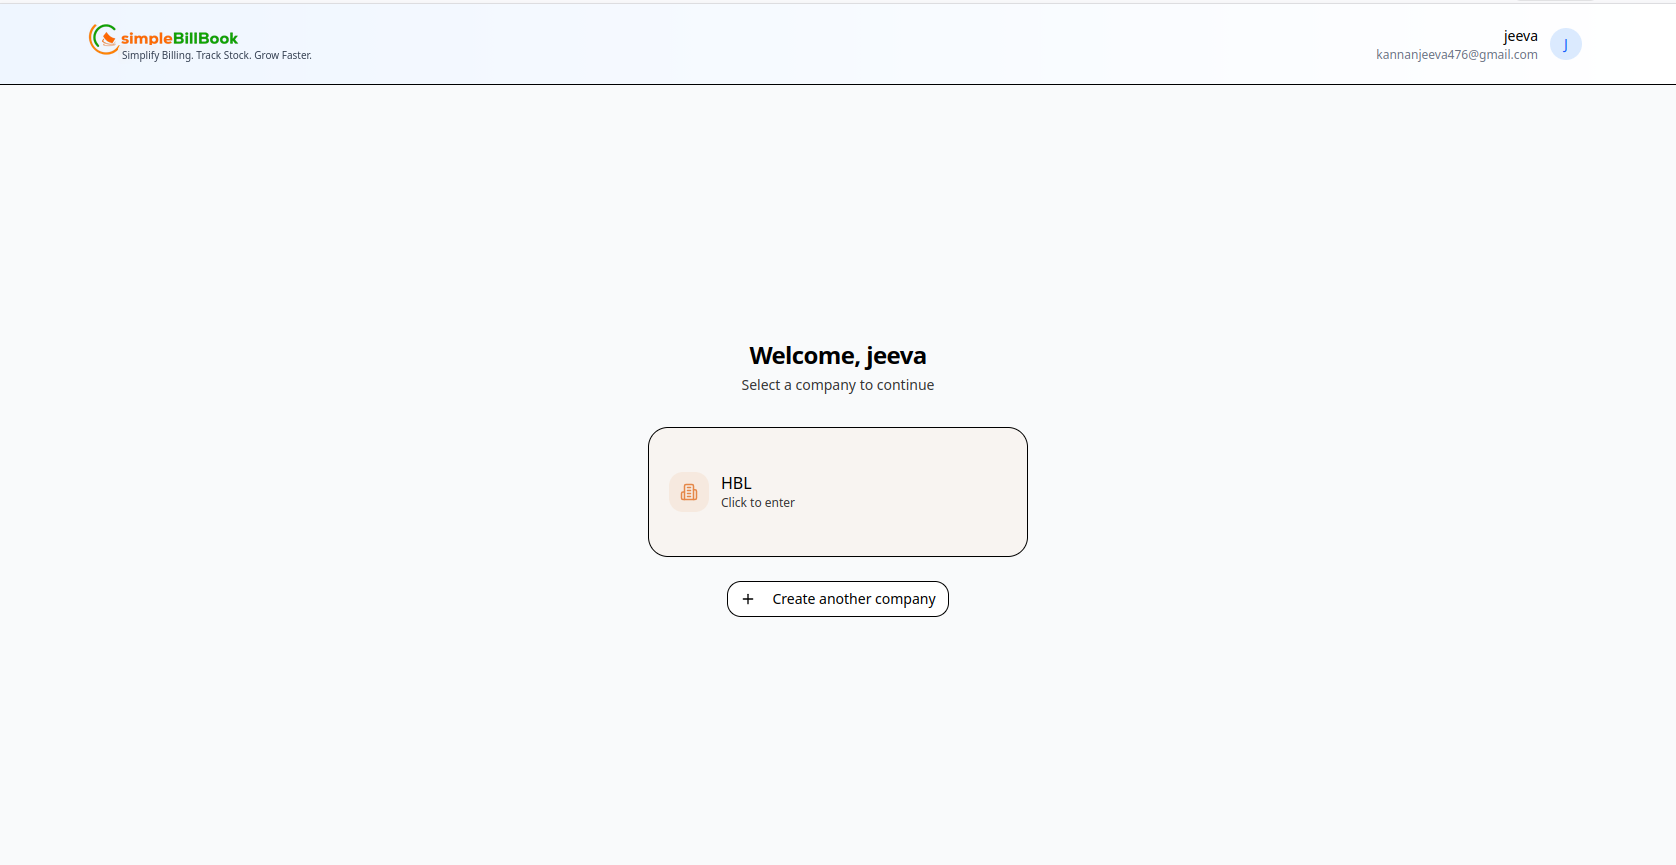 Figure 6: Select your company to enter the dashboard
Your Company Dashboard Shows:
- Welcome Message: "Welcome, jeeva"
- Instruction: "Select a company to continue"
- Company Card: Your created company (e.g., HBL)
- Action: Click to enter the company workspace